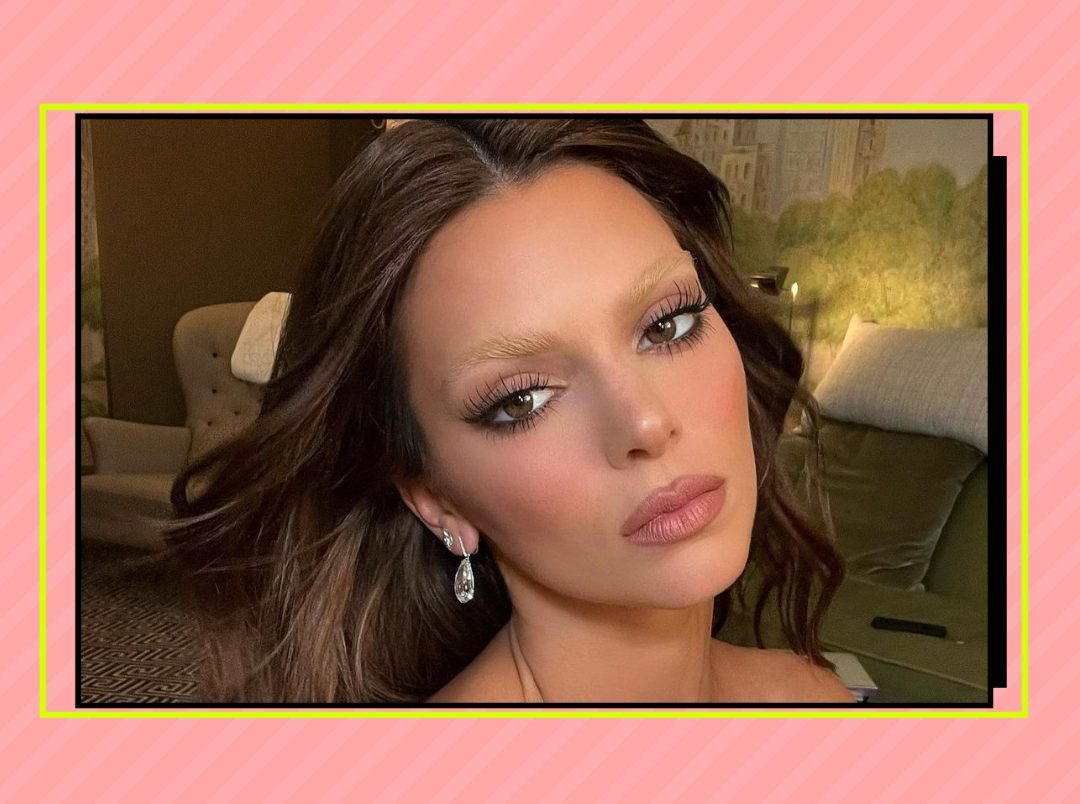
Remember the term “spider lashes” that referred to long clumpy lashes? Back in 2015, it wasn’t really a compliment and was more like a shoddy job by a makeup noob or a faux pas. Well, we’ve got some beauty tea to spill for y’all: those lashes are back and how! They’re reinvented, upgraded, and all inspired by the beautiful world of manga. Introducing manga lashes, which, BTW, has amassed over 2 million views on Instagram and counting.
We think manga lashes are a seriously gorgeous new style. They look super cute and wispy, plus they are beyond versatile. Whether you use them to elevate a no-makeup makeup look or team them up with graphic liner, it’s a certified look. Here’s the DL.
The 411 On Manga Lashes
“Manga” is the name for Japanese comic books and graphic novels, and their characters typically have razor-sharp, long lashes that Instagram now refers to as manga lashes. The look first became popular on a Chinese social media app and then transcended into Instagram with the help of Sacheau Beauty Founder, Saran Cheung. Ever since MUAs and Instagrammers have been recreating the look with falsies and bomb mascaras.
Spider Vs. Manga Lashes: What’s The Difference?
We know, we know – the similarity to spider lashes is uncanny. While spider lashes (something Kim K’s a fan of) use a heavy all-over coating of mascara on your lashes, manga lashes are less voluminous and more scattered than spider lashes, and the Instagram beauty community is placing them in a way to enhance their natural eye shape.
Here’s How To Try The Manga Lash Trend With Falsies
Step 1: Grab Your Falsies
If you can’t find the exact lash strip, this is the most effortless way to try the look. The first step is to find false lashes that are longer than your natural lash. Something like Huda Beauty Classic Lash – Claudia will help you hack the look.
Step 2: Cut The Strip Into Itty Bitty Sections
Use the knots on the lash band to cut the strip into itty bitty sections. You can cut the strip into five to seven pieces. Separate the individual falsies by length and save the longest bits for your outer corners.
Step 3: Apply Mascara
Apply mascara over your natural lashes as usual – a little extra curl can add more drama.
Step 4: Apply The Lash Clusters
Use a pair of tweezers to place each lash cluster as close to your lash line as possible. Once again, apply the shorter clusters to the inner corner and gradually lengthen the lash towards the outer corner.
Step 5: Enhance Your Lower Lash Line
Attach the smallest cluster to your bottom lash line, spacing them apart as you previously did.
Hello, statement eyes!
Featured Image: Instagram