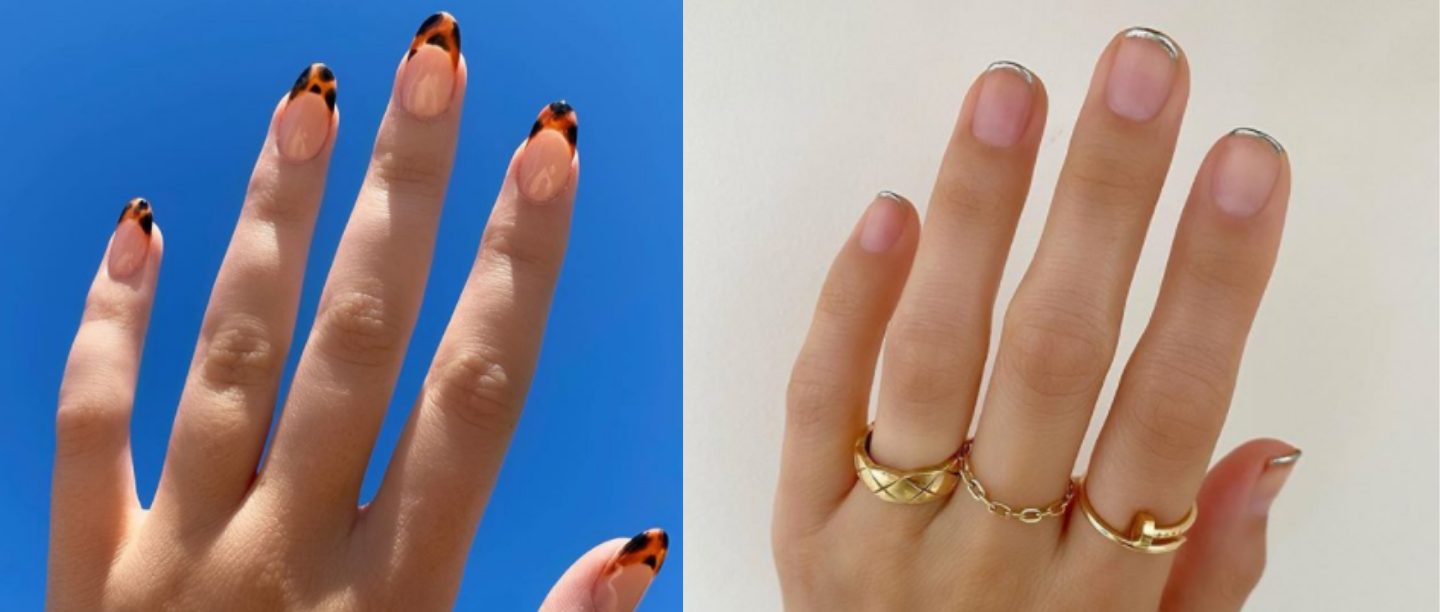
ICYMI, French nails are one of the hottest nail trends of the season…yet again! Yes, the classic white tips are back! Come to think of it, when did they ever leave? They are iconic, let nobody tell you any different.
We all have tried to nail the classic French tips ourselves at least once in our lives. Even though most of us failed miserably in the first try (I know I did), you gotta admit, they look great and go with any outfit, any mood. But you know this Instagram generation and how it has to add a millennial twist to everything. Gone are the days when French manicure meant applying a white shade on your nail tips. Just a quick glance at your Instagram feed and you’ll notice all sorts of French tips doing rounds–metallic, matte, multicoloured, even animal print! Here are 10 of our favourites!
French Tips, But Make Them Cooler
We are in awe of these fresh takes on the classic nail trend. But before we get to them, here’s what you’ll need to recreate:
– Lots of nail polishes (think mattes, pastels, neons, what have you!)
– Scotch tape or nail tip stickers
– Top and base coat
Step 1: Apply the basecoat all over your nails.
Step 2: Using the nail sticker/tape, cover the non-white part of your nails so that you can paint the rest neatly.
Step 3: Apply two coats of your preferred nail polish. Let it dry before peeling off the sticker/tape.
Step 4: Don’t forget to seal your artwork with the topcoat!
Show Off Your Wild Side
Okay, how sexy are these? For this, after you’ve applied brown nail polish on your tips and let it dry, using a black liner (for precision) start making tiny circles on your tips, fill them up and that’s basically it.
For When You Cannot Decide The Colour You Want
Now, this mani is sure to uplift your mood. To do this right, you might want to take help from someone. All you gotta do is cut your tape bits in a tear-drop shape and get fillin’ the triangles, baby! Looks best on square-shape nails, but feel free to experiment.
Double Trouble!
A double French tip? Personally, I love this one! You can use both shades if you cannot decide between two or just bring out your creative side by wearing contrasting colours (red + pink would look so bomb!). Here’s how to go about it:
Step 1: Paint all your nails with the colour you want at the bottom (in this case, the lighter pink). Make sure you place your nail stickers/tape slightly lower as you’ll need space to add the other shade too.
Step 2: Once dry, peel off your stickers/tape.
Step 3: Now cover half the part of your previous nail colour with stickers/tape and paint the remaining upper part with the second colour.
Finish off with some topcoat and there you have it, a double French tip in no time!
A Silver Lining
If you are classy, bougie, rachet (you know what I’m talking about, yeah?), you have to try this one! Simply replace the signature white with a silver shade and that’s it! If you have short nails, go with either a chrome nail paint or a metallic one ‘coz that’s gonna shine like 4th of July.
Basic-ally Black
Because black is eternal love 🖤 If you too cannot get over your love for all things black, this dark, semi-goth French tip idea should be your next #ManiInspiration.
Pastel Vibes FTW
This half-and-half pastel French mani is for everyone who loves softer hues. The best way to do this is by colouring one half of the nail tip with one shade, letting it dry, and completing the other half with the second shade.
‘Coz Neon Is Always ON!
This ones simple–just replace your go-to white with a neon shade of your choice (yes, we have some options for you) and your nails are ready to take over Instagram!
Black With A Twist
Now, this one’s a little complicated, so make sure you have all the essentials i.e. black nail polish, nail stickers, animal printed cloth, scissors, and nail glue. Let’s go:
Step 1: Do a black French mani on all your nails.
Step 2: Using a pair of scissors, cut out the cloth in the shape you wish to have on your nails (an inverted triangle, an ellipse or a simple dot).
Step 3: Using nail glue, stick the cut-out onto the lower part of your nail and let it dry for at least 5 minutes.
Step 4: Seal your nail art with some topcoat.
Holo ‘Coz YOLO!
Where my fellow holosexuals at? I love adding a holographic touch to my beauty routine, whether it’s on my lids or all over my cheeks and, yes, even on my nails! Ditch your boring matte shades for a holographic one and we bet your nails would be doing all the talking for you!
Always A Metal Fan
If you’re a big metal fan (you know what I mean), try this out today! Sadly, the metallic trend never really takes off as it’s not everyone’s cup of tea but you can always bring it back by painting your tips with a fun metallic shade. We come with many options to spoil you silly:
So, which one of these are you trying first?
Featured Image: Instagram